 Cowpens
Historical Significance
Although a smaller affair compared to many other battles of the American Revolution (with only slightly over 3,000 men engaged in total), the Battle of Cowpens was a significant moral victory for the Continental forces in the Southern Colonies. By annihilating an entire brigade of some of the best British troops in the region, the Americans forced the British to reevaluate their conquest of the Carolinas—leading a chain of events that would lead to the British concentration at Yorktown, VA.
Tactical Importance
1780 had been a bad year for the American forces in the Southern Colonies: Gen Benjamin Lincoln’s army was captured in the Siege of Charleston, Gen Horatio Gate’s army was severely beaten in the Battle of Camden, and the region erupted into civil war between Patriots and Loyalists. Only the American victory at the Battle of Kings Mountain offer any hope for the campaign in the south. To repair the situation on the southern front, Gen George Washington ordered Nathanael Greene to assume command of the continental forces. Going against conventional military wisdom, Greene divided his forces in the face of a superior enemy and sent a portion of his army under the command of Daniel Morgan west of Charlotte, NC, near the Broad and Pacolet rivers to influence the local population and obtain supplies. Alternately, the British commander, Lord Charlese Cornwallis, was planning his invasion of North Carolina. Realizing that Daniel Morgan’s force threatened his flank, Cornwallis ordered LtCol Banastre Tarleton to move west to disperse the American forces. Based on faulty intelligence indication Morgan was advancing toward Fort Ninety-Six, Tarleton moved to the vicinity of the fort only to realize Morgan was not there. Tarleton then began a rapid advance toward Morgan’s position near the Broad River—intending to catch the Americans as they retreated across.
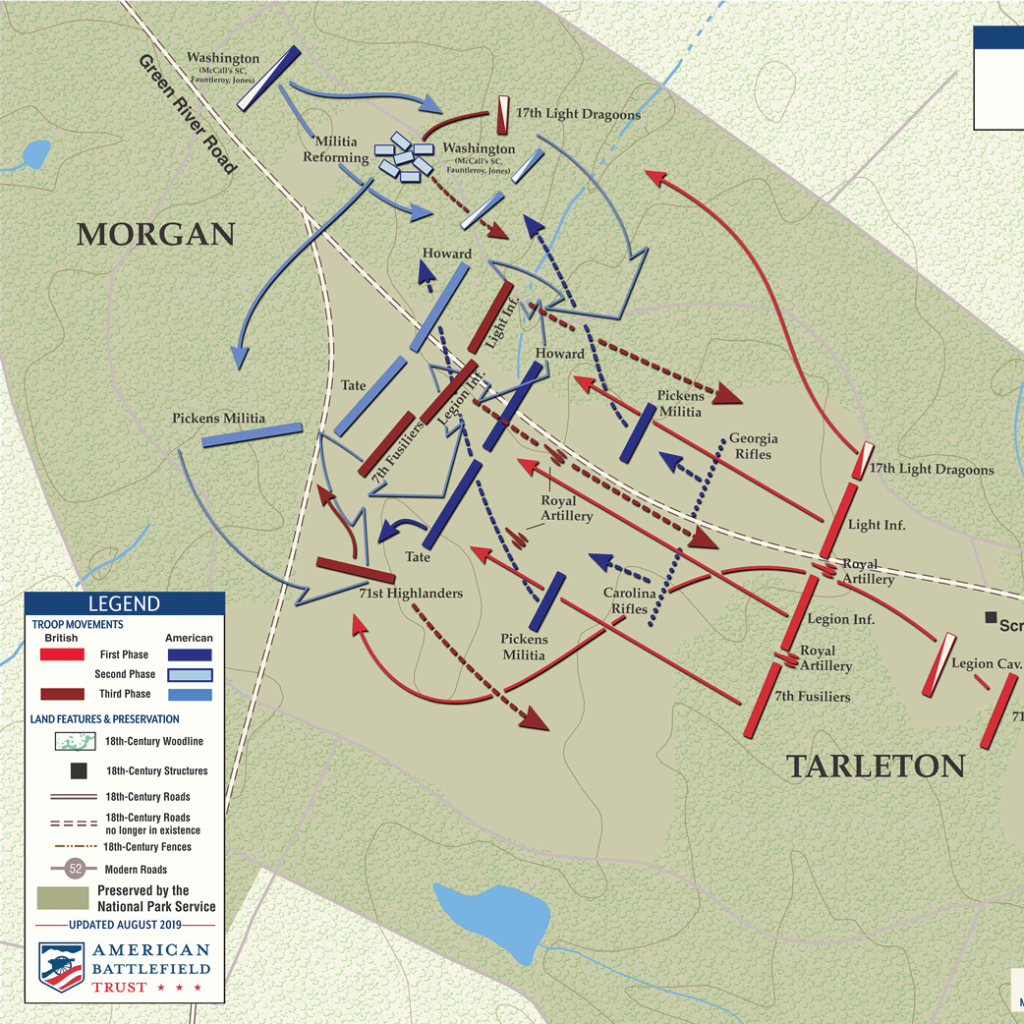
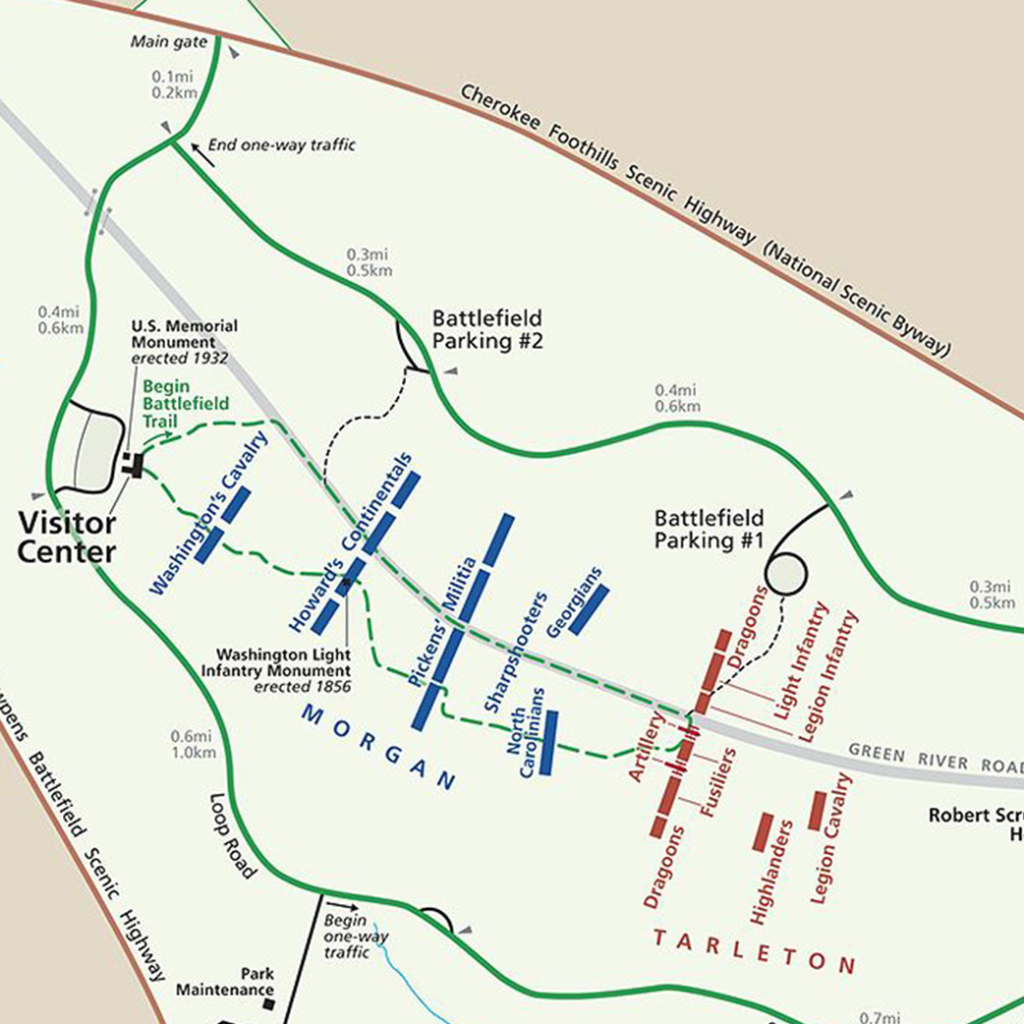
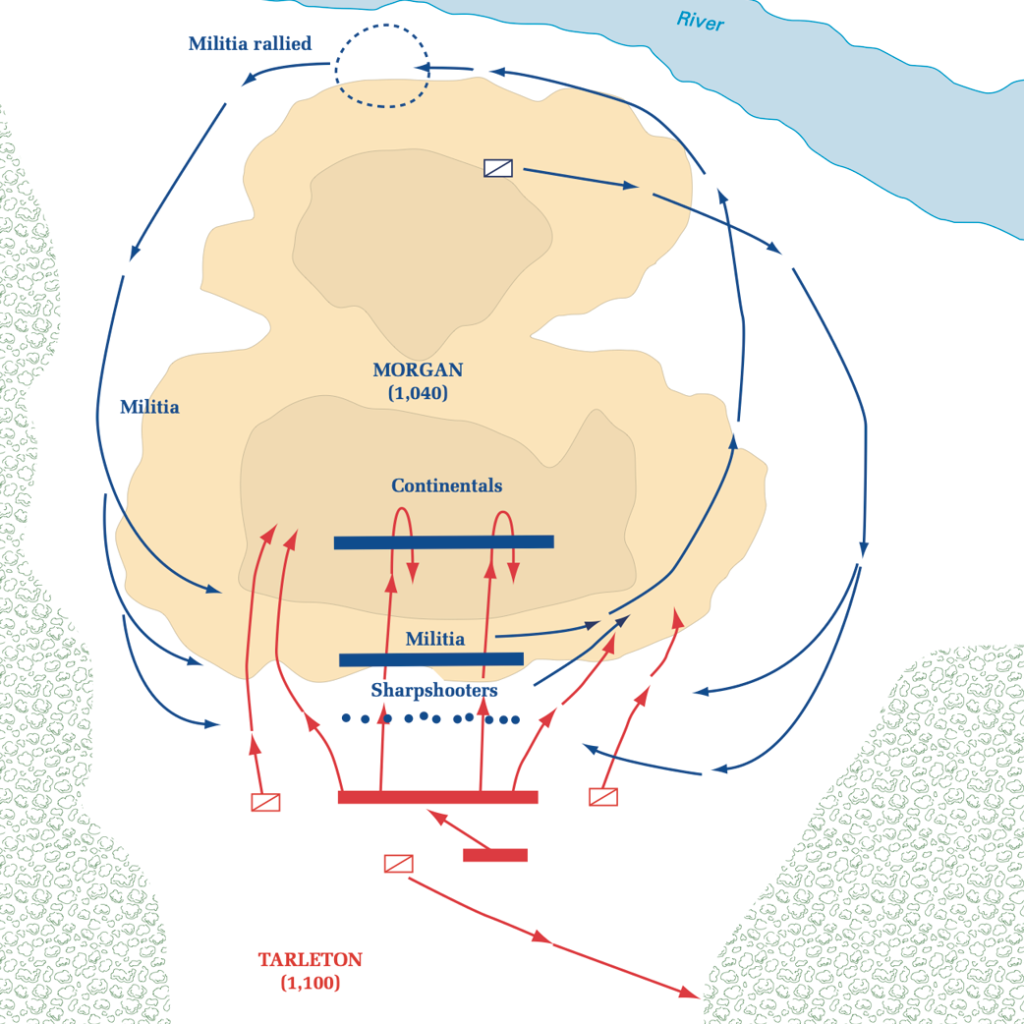
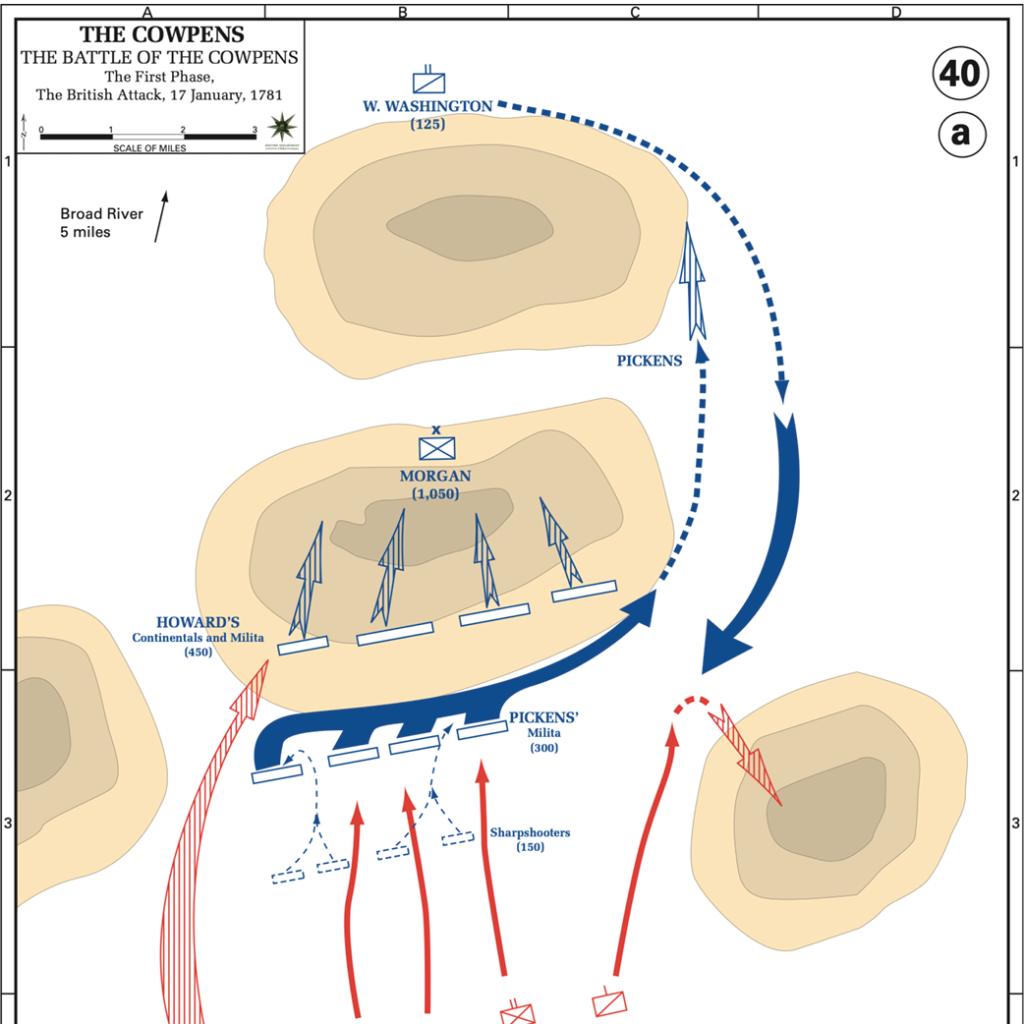
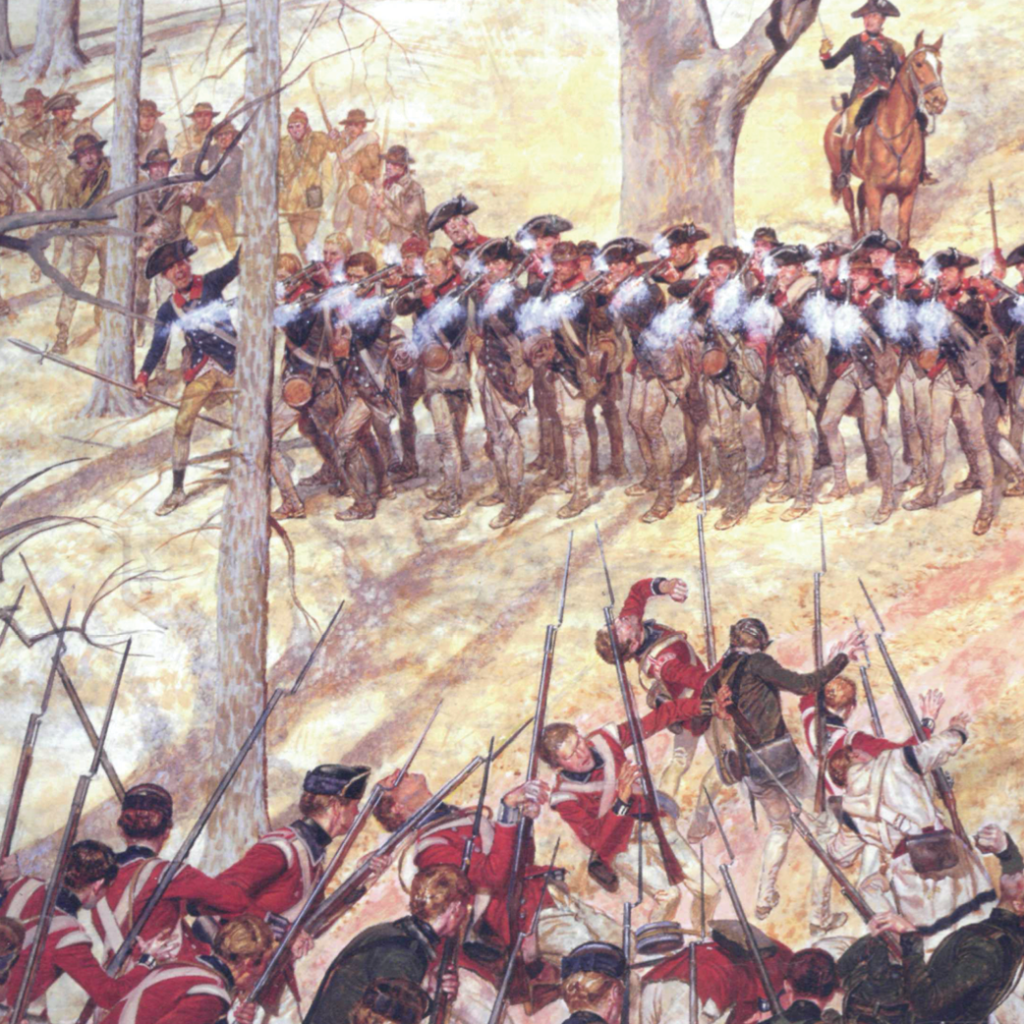
However, Morgan intended to give battle to the British forces rather than retreat. He chose his position in a large, open clearing known as Hannah’s Cowpens. Taking advantage of the terrain with its open fields, hills, and with both flanks protected by dense woods, Morgan arrayed his forces, numbering between 1,000-2,000 men, with a defense-in-depth. Up front, he posted his skirmishers to harass the enemy formations; behind them was his militia forces; finally, he had his regulars supported by cavalry in the rear. His plan was to lure the British into attacking his militia—which were notoriously unreliable in formal battles. As the British advanced, the skirmishers and militia were ordered only to offer brief resistance before retreating to the next line of defense. The rolling hills prevented the British forces from seeing the depth of the American position. As the British advanced, they would be susceptible to an increasing volume of fire. With the Broad River cutting off his line of retreat, Morgan knew that he presented a tempting target for Tarleton’s forces—numbering around 1,000 men.
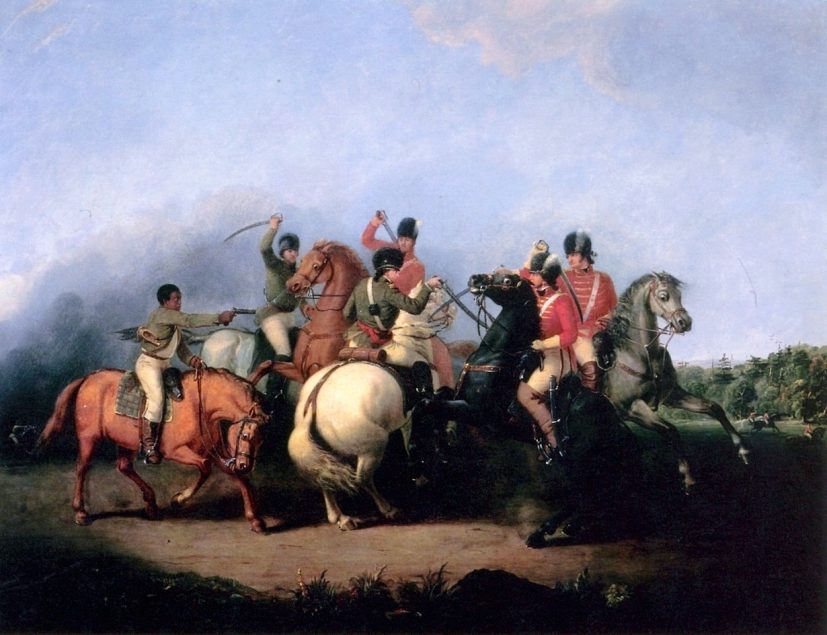
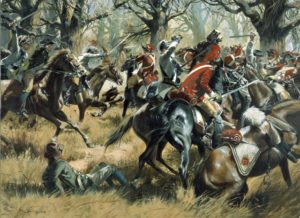
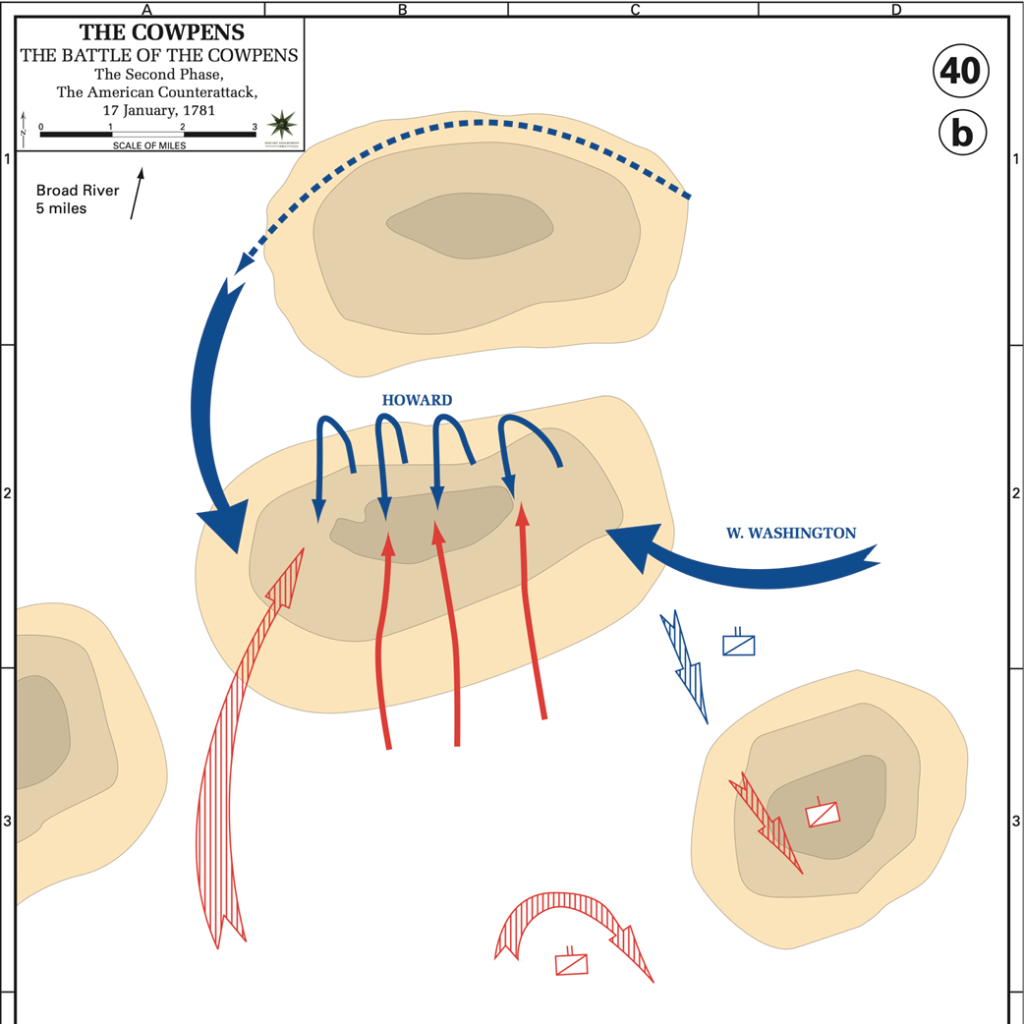
On the morning of 17 January 1781, Tarleton marched his forces toward the American position. Seeing only militia, he decided to throw the full weight of his forces in a frontal assault against the Americans. As planned, Morgan’s skirmishers fired off a few shots before joining the militia line—who in turn unleashed a few volleys before withdrawing. The British advanced, only the face the third line of American regulars supported by their skirmishers and militia. However, the British attempted to flank the American right, and as the Americans attempted to reform to face the new threat, the chaos of battle caused other American units to withdraw. Noticing what appeared to be a retreat, the British advanced forward. As they neared the Americans, Morgan managed to stabilize his lines and unleashed a close-range volley in the faces of the advancing British soldiers. He then ordered his own charge, driving back the British advance, taking many prisoners, and capturing two cannons. While this occurred, Morgan’s cavalry flanked the British right flank and bounded into their rear—chaos ensured. This successful double envelopment routed the remaining British forces from the field. While American casualties were light, the British suffered over 80 percent, most of whom were captured.
Strategic Impact
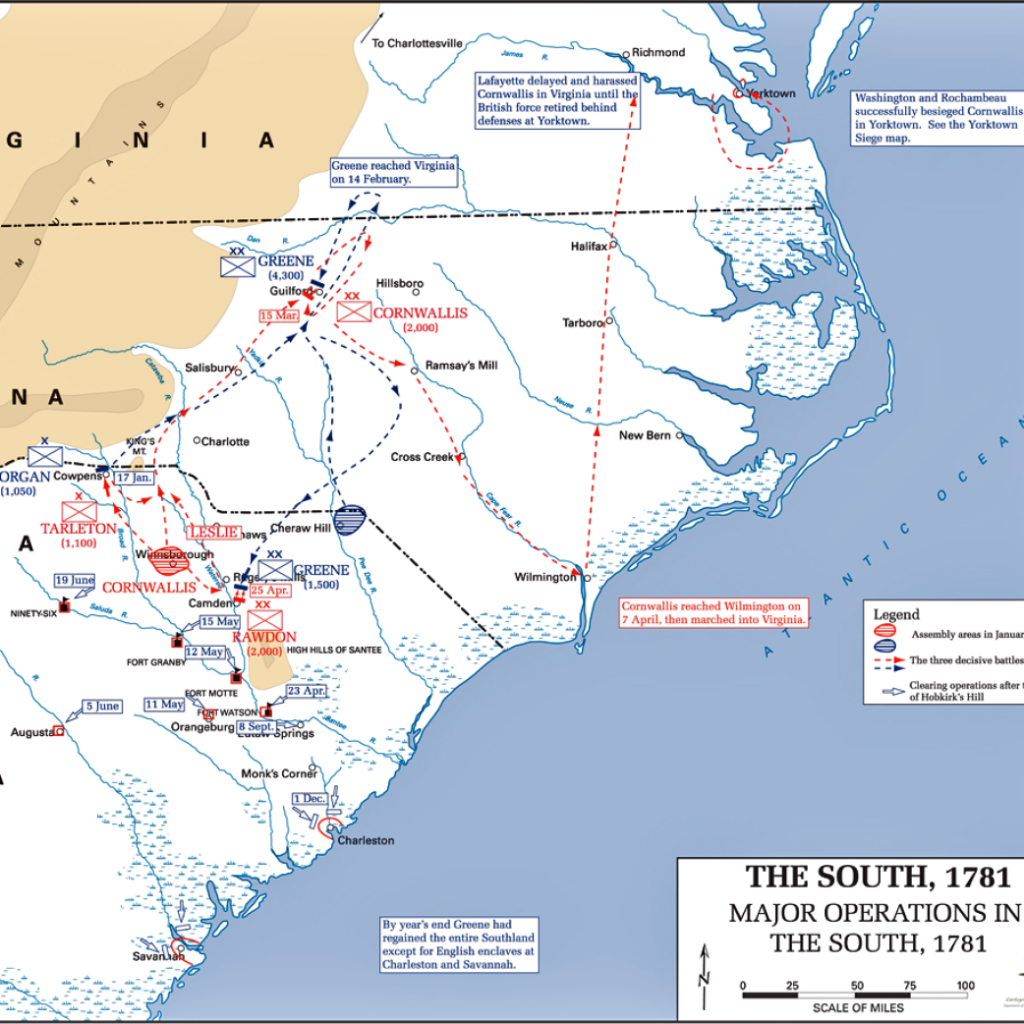
Combined with the victory at the Battle of Kings Mountain, the Battle of Cowpens signified a major victory for the American cause in the South. The near decimation of Tarleton’s forces deprived Cornwallis of some of his most effective troops and forced him to give up his campaign of pacification in South Carolina. Cornwallis then embarked on a campaign into North Carolina, and after a string of inconclusive battles, decided to move his weakened army to Yorktown, setting the stage for the end of the war.
Related Articles
The Marine Corps Gazette and Leatherneck Magazine archives have more than 100 years of articles. Click the buttons below to read articles about the Battle of Cowpens and its implications on the Corps, yesterday and today.
Globe, Anchor- And Saddle!
Jim Blackton
Leatherneck
July 1957
Maps
Cowpens, SC
January 17, 1781
Cowpens Battle Map
Cowpens, South Carolina
The Battle of Cowpens,
17 January 1781
The First Phase,
The British Attack,
17 January, 1781
The Second Phase, The American Counterattack,
17 January, 1781
The South, 1781 Major Operations in the South, 1781
Study Guide

Podcasts
Books
Videos
Other Resources

Cowpens Virtual Tour
American Battlefield Trust
The Cowpens Staff Ride: A Study in Leadership
William J. Hourihan
The Army Chaplaincy Winter 1998
Ed Bearss Battlefield Tour
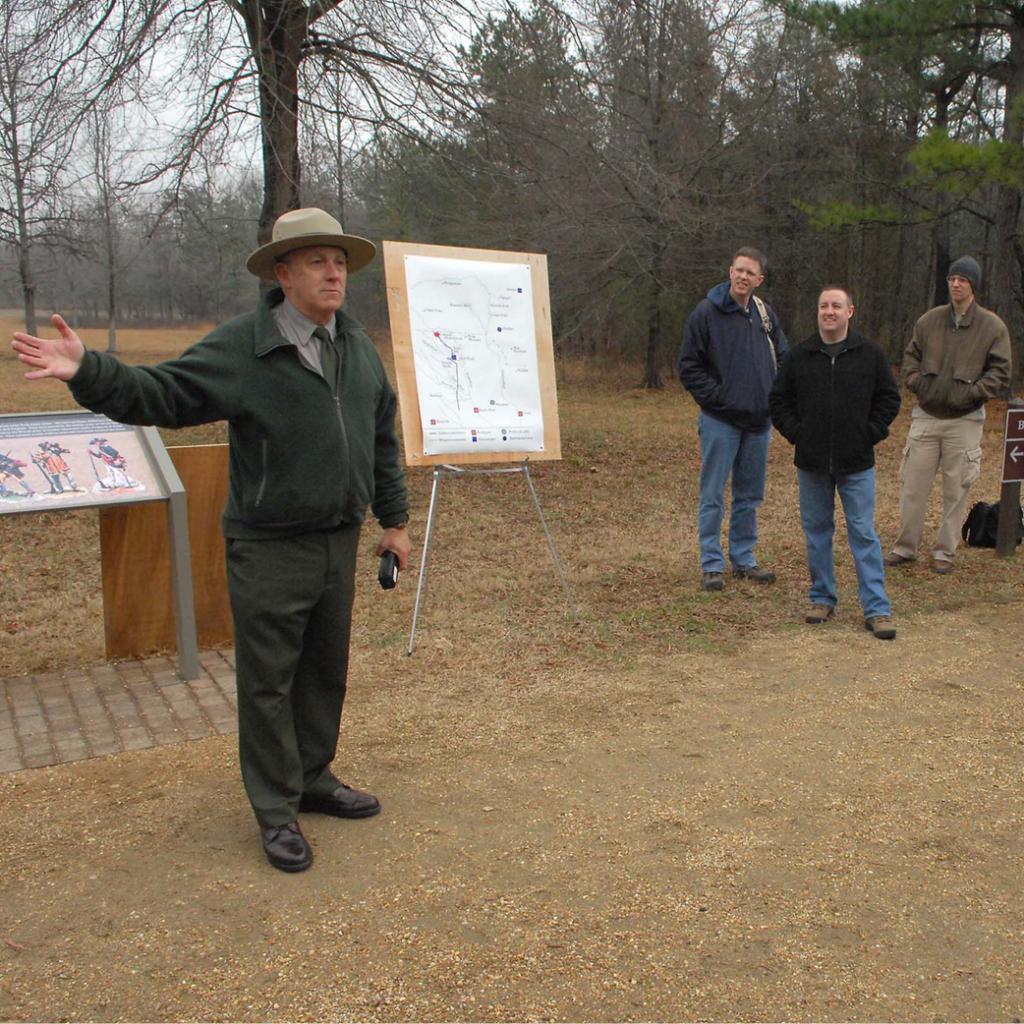
National Park Service
Cowpens National Battlefield
Cowpens National Battlefield Administrative History
Cameron Binkley
Steven A. Davis
February 2002